Mexico Joe
Cholla Bay 4 Life
I wanted to write this post for a while now after the Boo Bar Poker Run 2020. There was a gentlemen that I did not get a chance to meet before the 2nd stop that wanted to talk to me about my Toyota Tacoma. The gentlemen had just purchased a first generation Toyota Tacoma and at the first stop he came over to talk about our trucks and what I've done to mine to make it an excellent Rocky Point off road fun run vehicle. Unfortunately, I was talking to a friend when he came over so my girlfriend told him that I would find him at the next stop to chat. Well, before the second stop the truck broke (my fault not the truck) so I never got a chance to field any of his questions or educate him on anything he was interested in. I suspect the itch caught him when I passed him in some really rough stuff and he saw what our trucks are capable of with a few changes. I feel there's many people who want something fun without having to get fully invested in a SXS (side by side) Can AM or Polaris for $25k plus the need for a trailer and such. Although those vehicles are extremely reliable and very capable there are still a few downsides in my humble opinion. For some the SXS's are just what they need. For others, they enjoy creature comforts, like AC and Heat and of not having sand/dirt hit you in the face and all down the cracks of every part of your body. Breathing fresh air will cost more in a SXS too because of the necessity for an air filter/pumper system which can only be used with a helmet.
I also want to start this post for others to post about their vehicles and set ups. Even SXS's are welcome! The one thing this forum has never had is a dedicated page to off roading in and around RP. Post up trip pics, vehicle pics, vehicle specs, suspension set ups, power adders ANYTHING off road related. I suspect there are a fair amount of users that can participate in this forum thread. Rocky Point has always been a fishing/off roaders get a way!
Ok! Let's get this started.
As they used to say on the forums in the early/mid 2000's ------------------ 256k BEWARE!!!!!! --------------------------------------
First Generation Toyota Tacoma 1996-2004
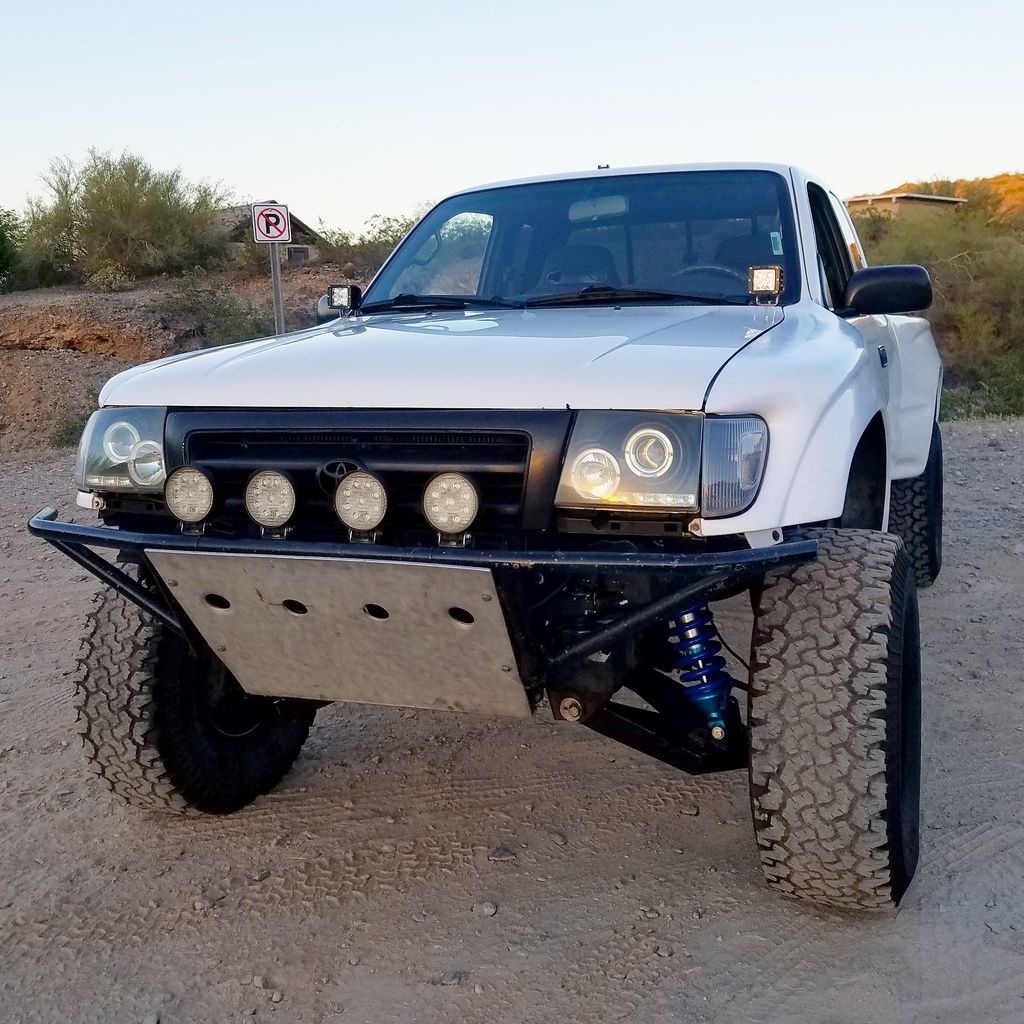
My vehicle: 99 Toyota Tacoma Prerunner SR5 3.4l V6 with a 3 speed tranny w/ electronic OD. Electronic locking rear diff.
Engine: 5vzfe, K&N cold air intake and throttle body spacer. Throttle body has been ported. Doug Thorley Headers, Flow Master 40 exhaust
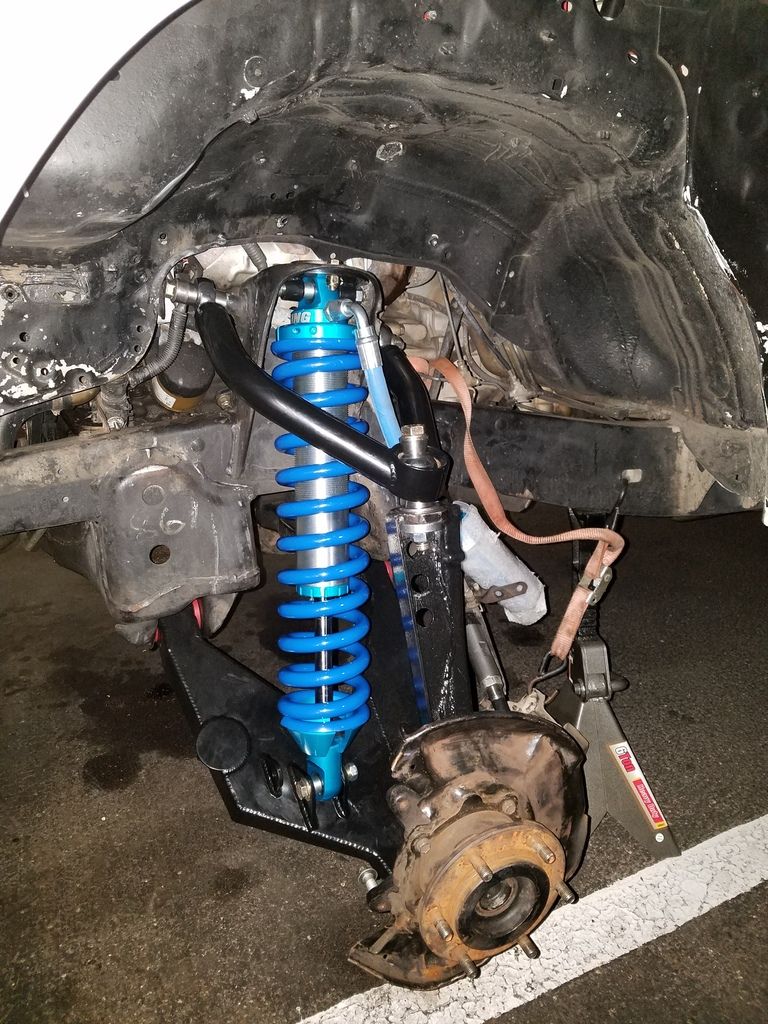
Suspension: Front - Solo Motorsports 3.5 Long Travel Kit, 8" King Race Series Coilover Shocks with resis, limit straps.
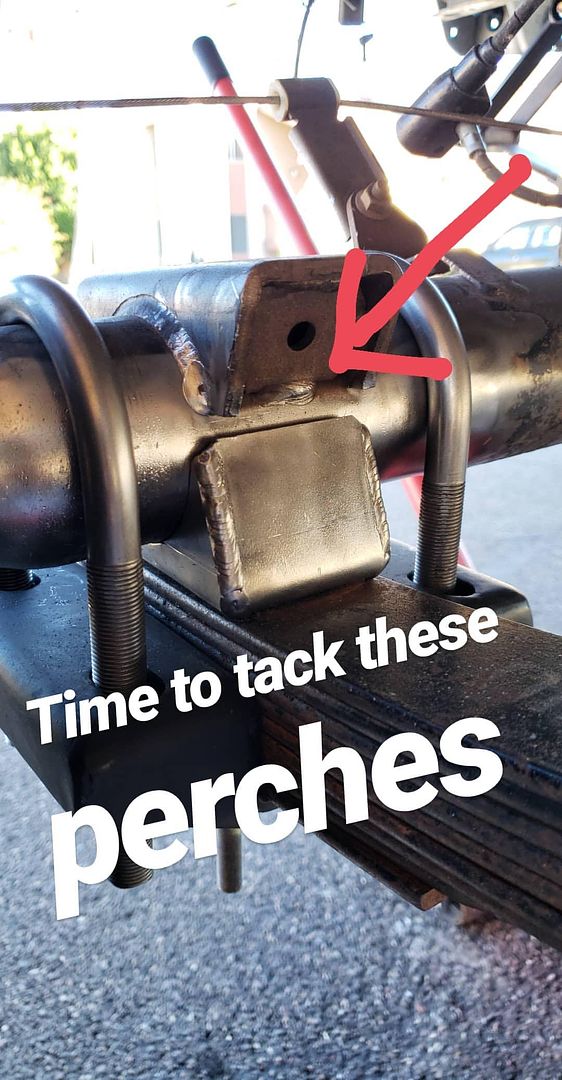
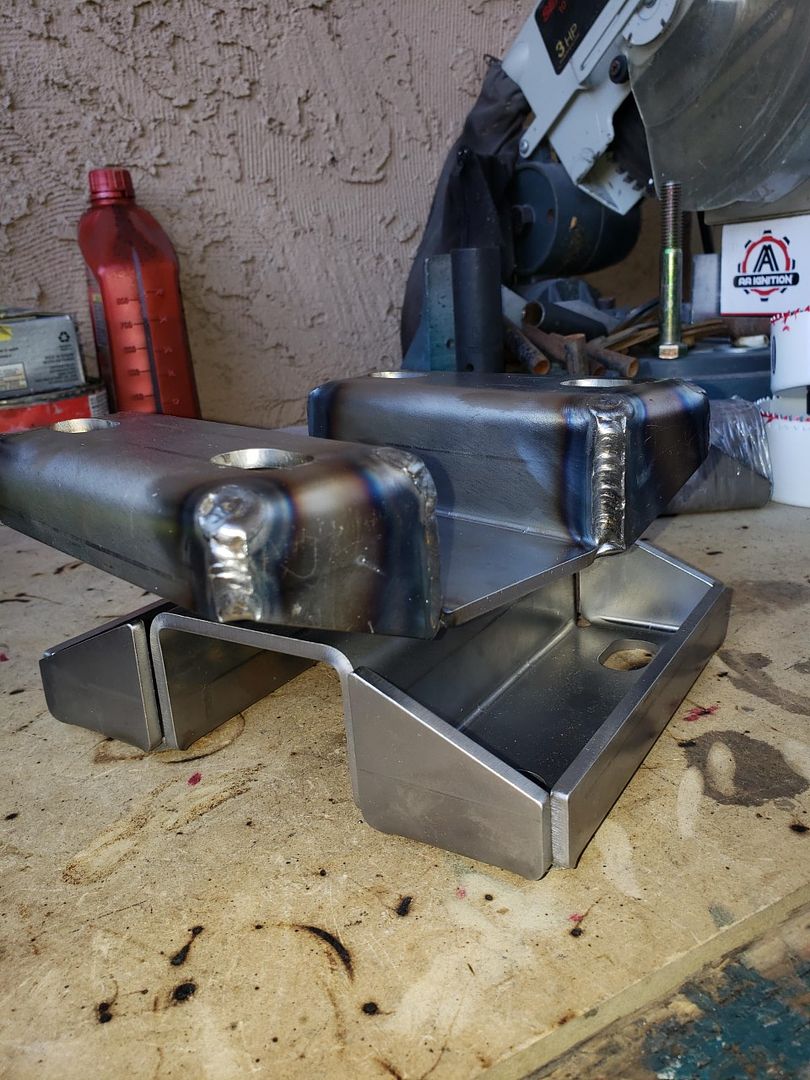
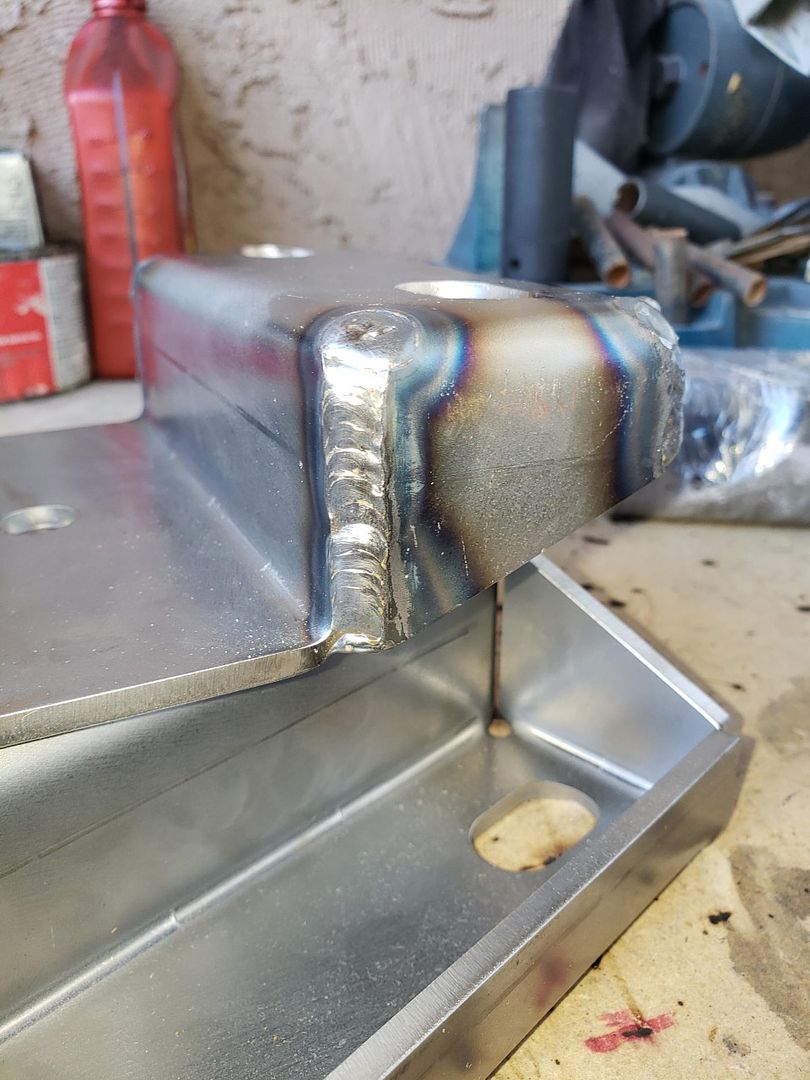
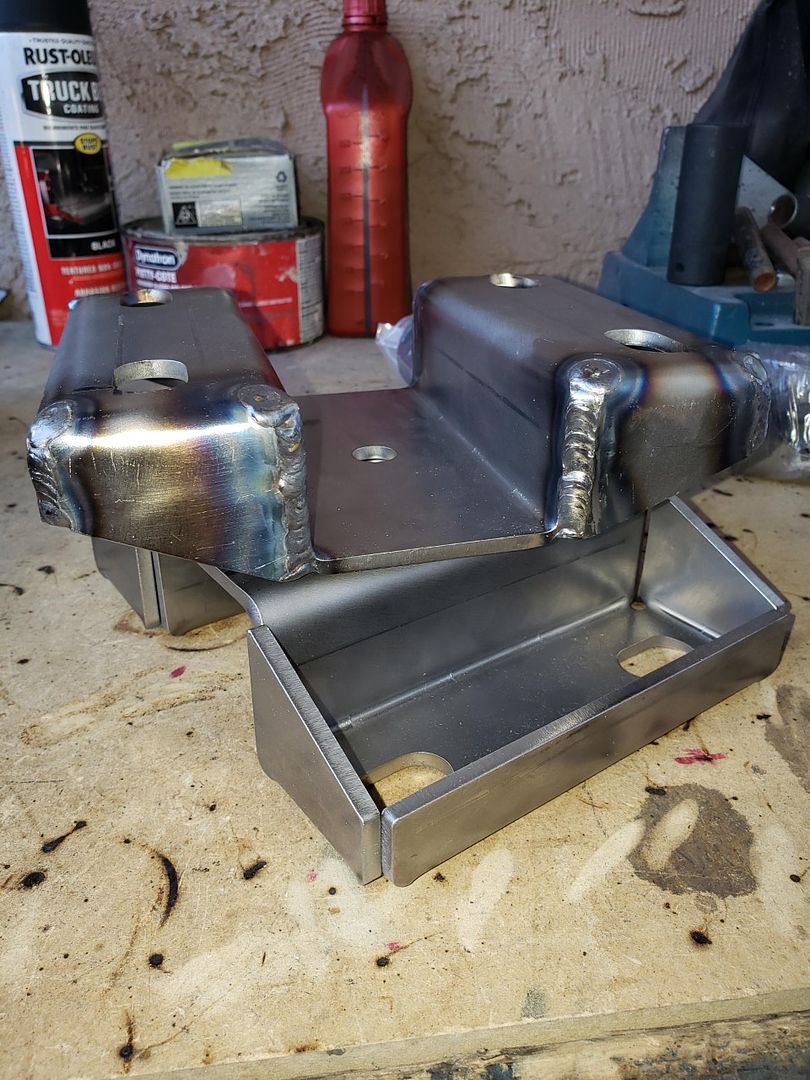
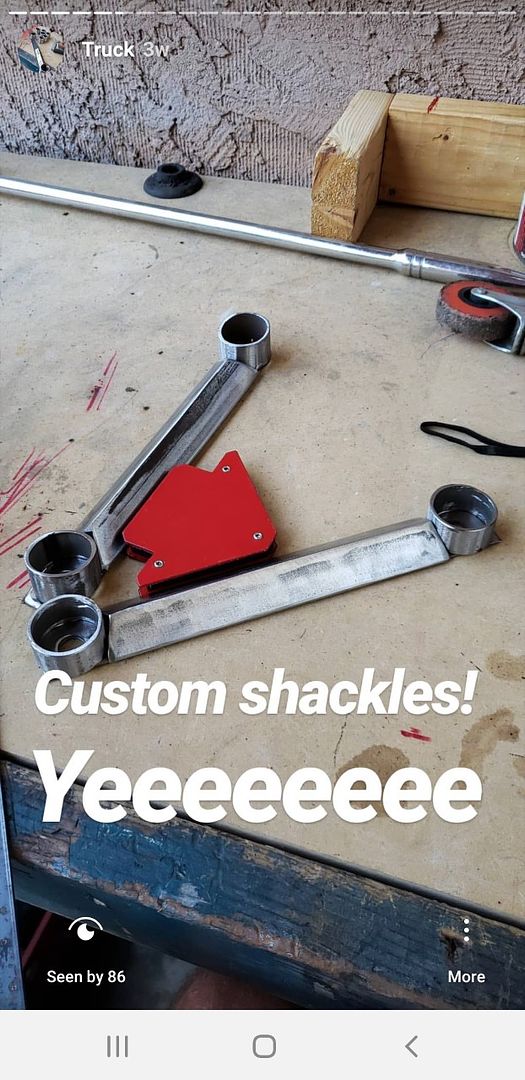
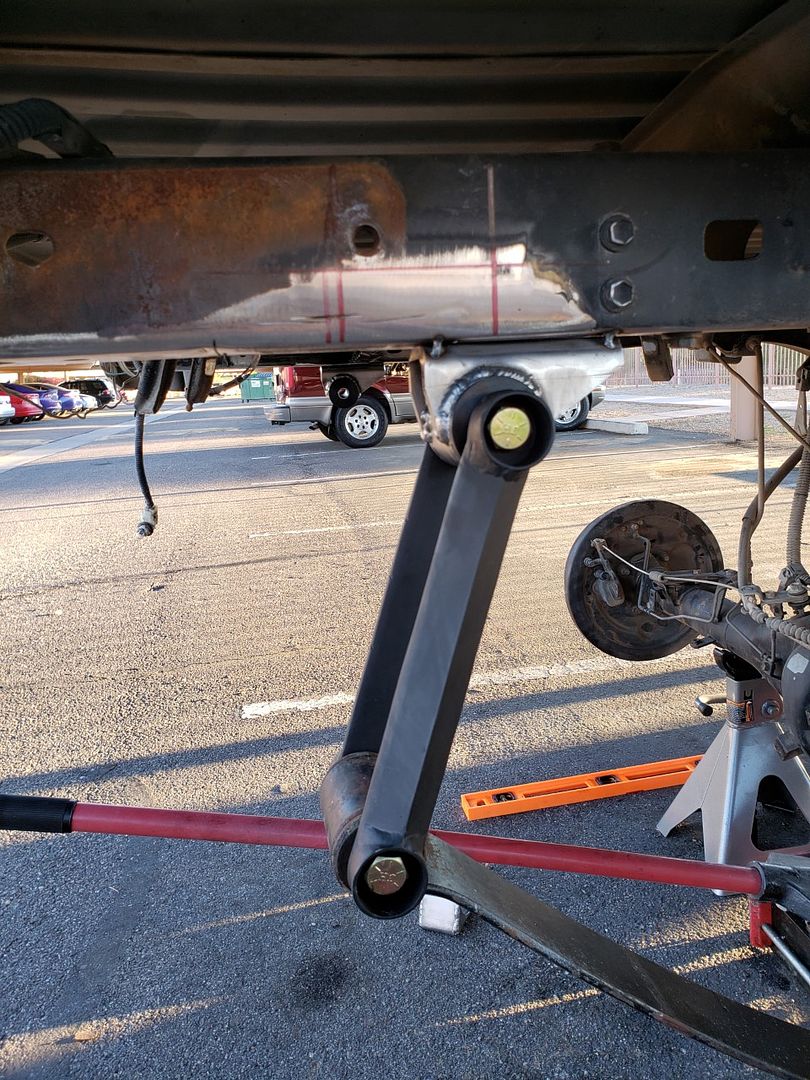
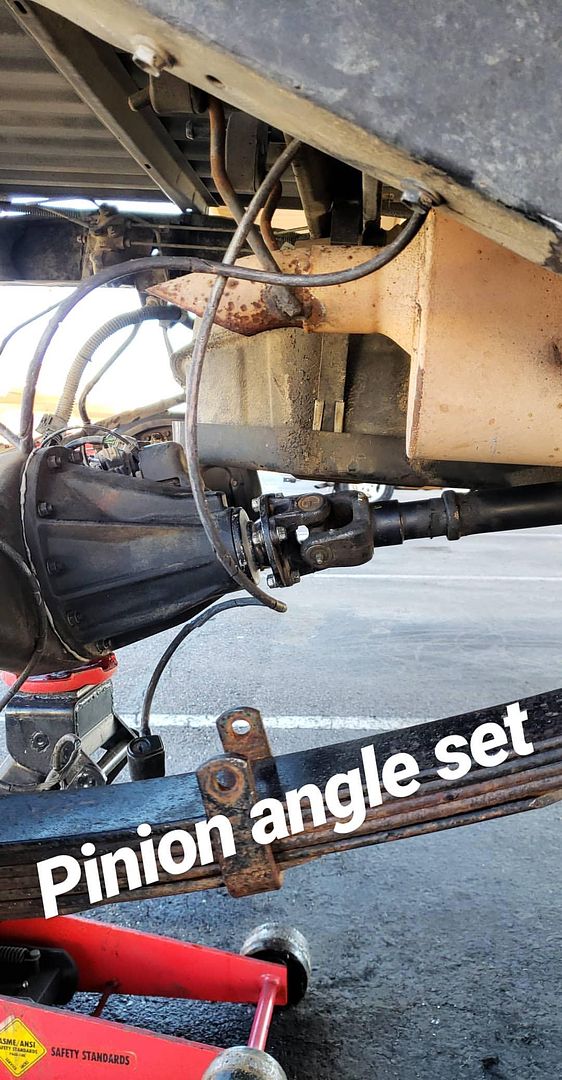
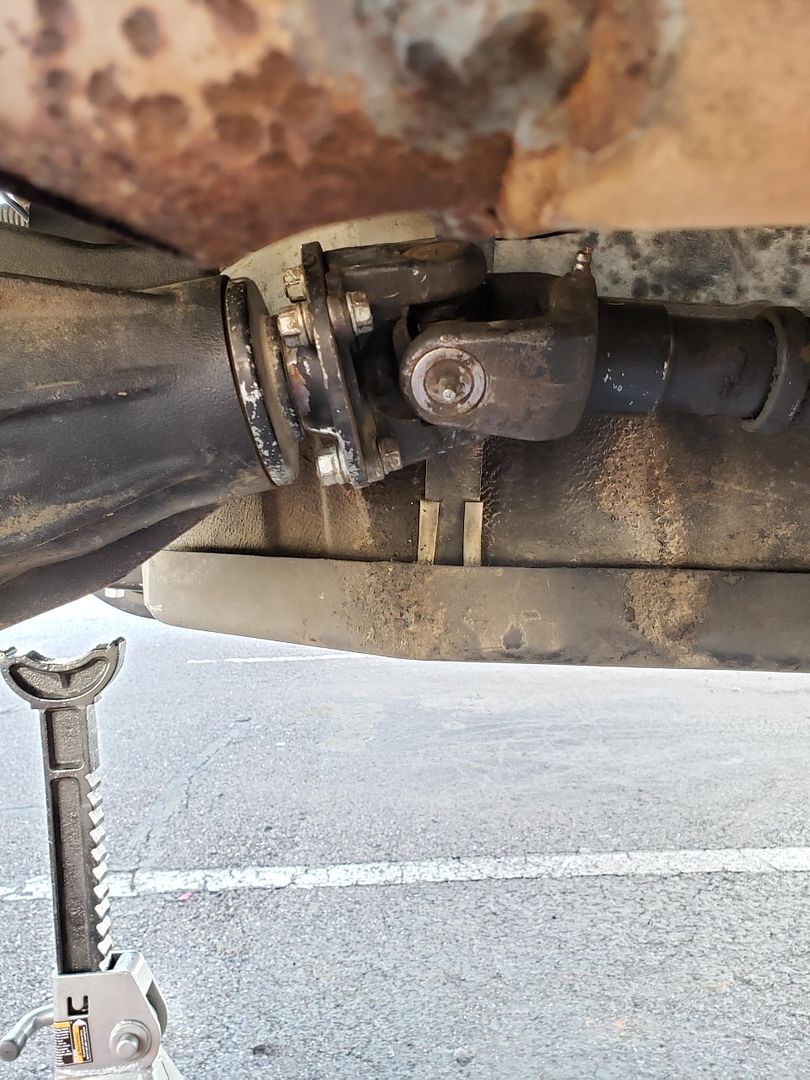
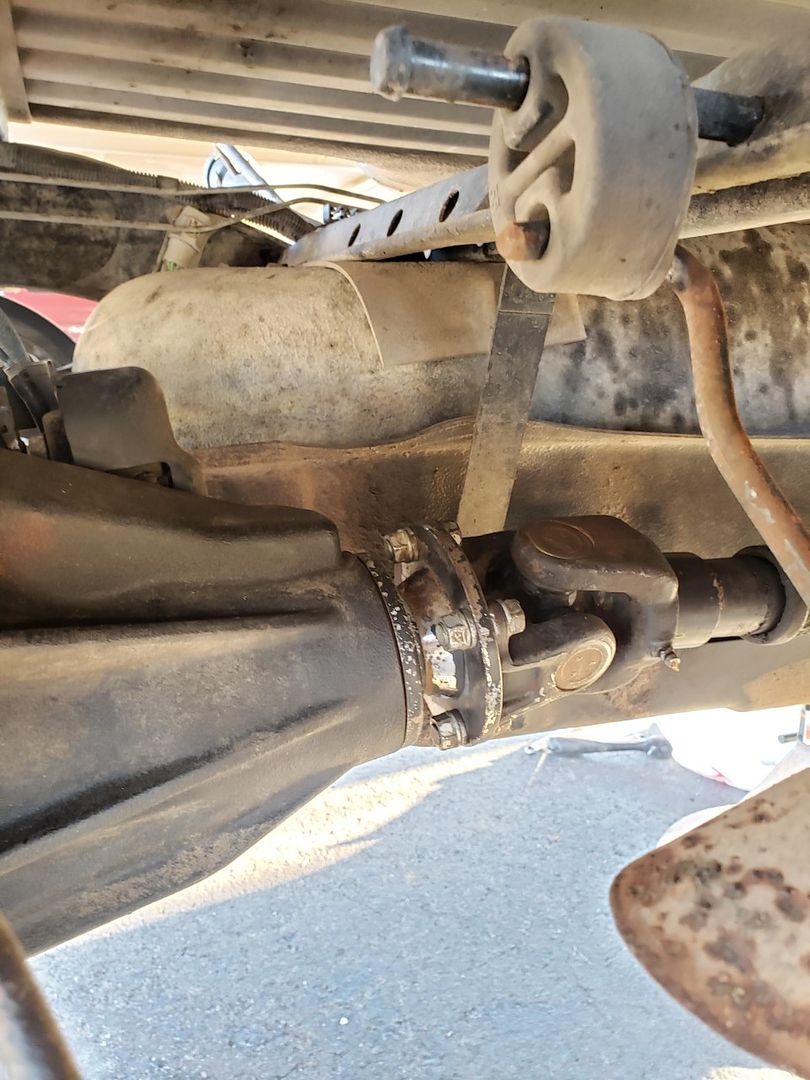
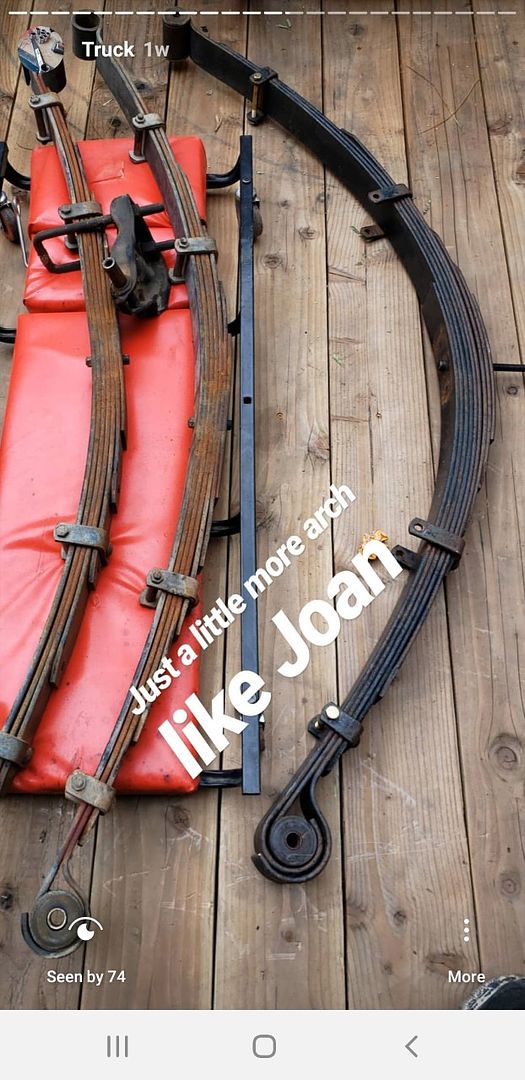
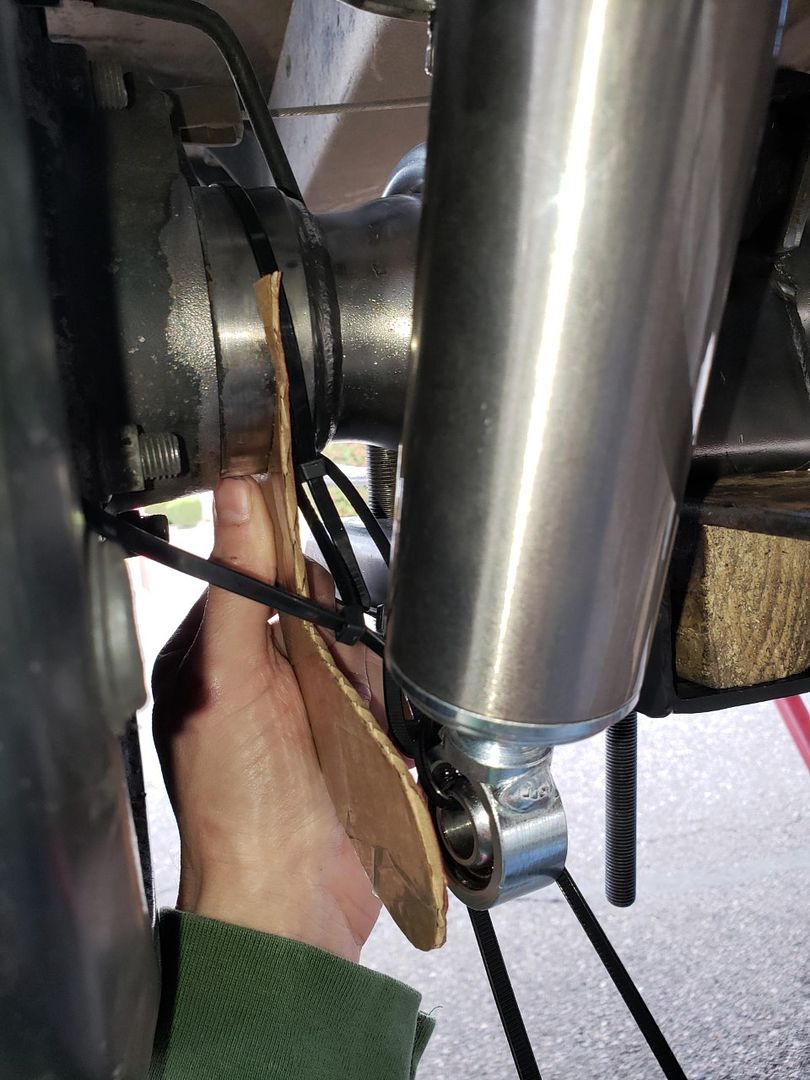
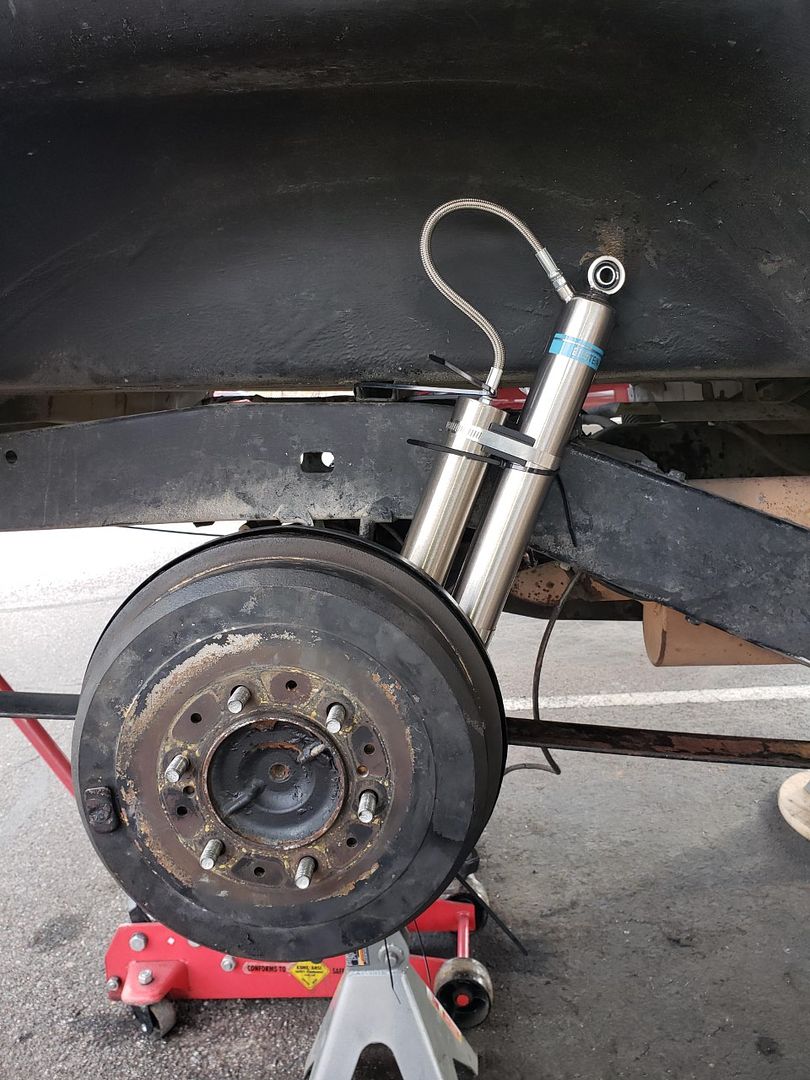
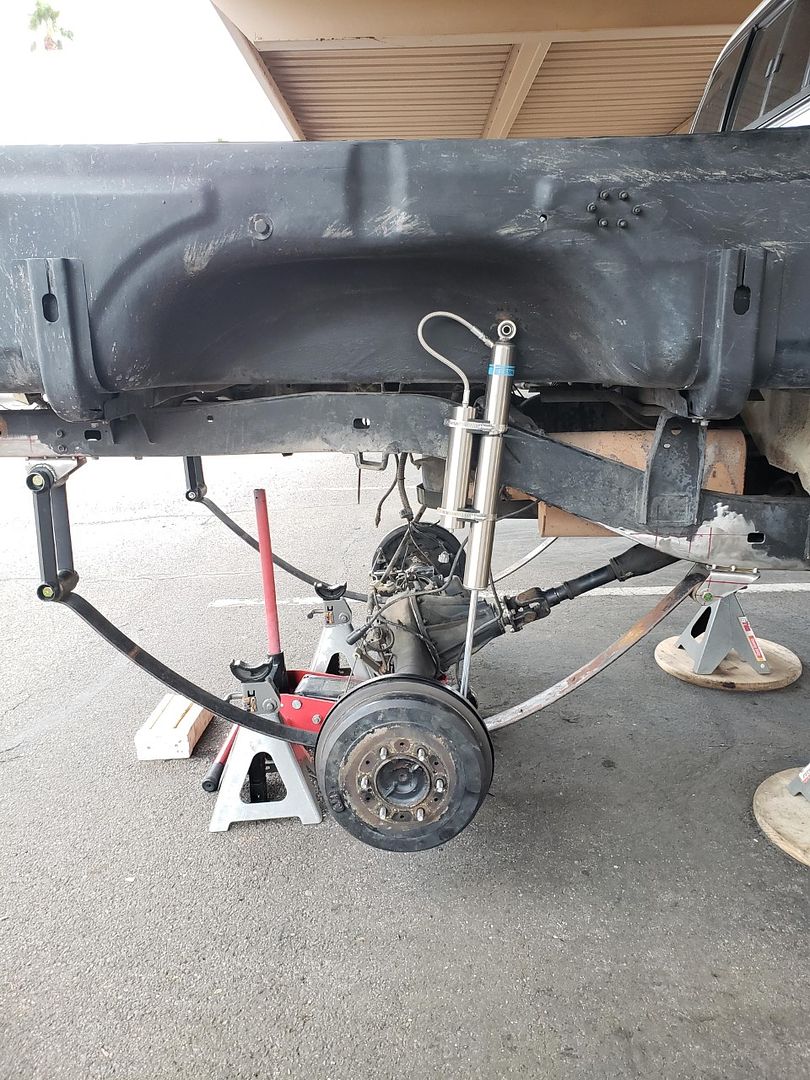
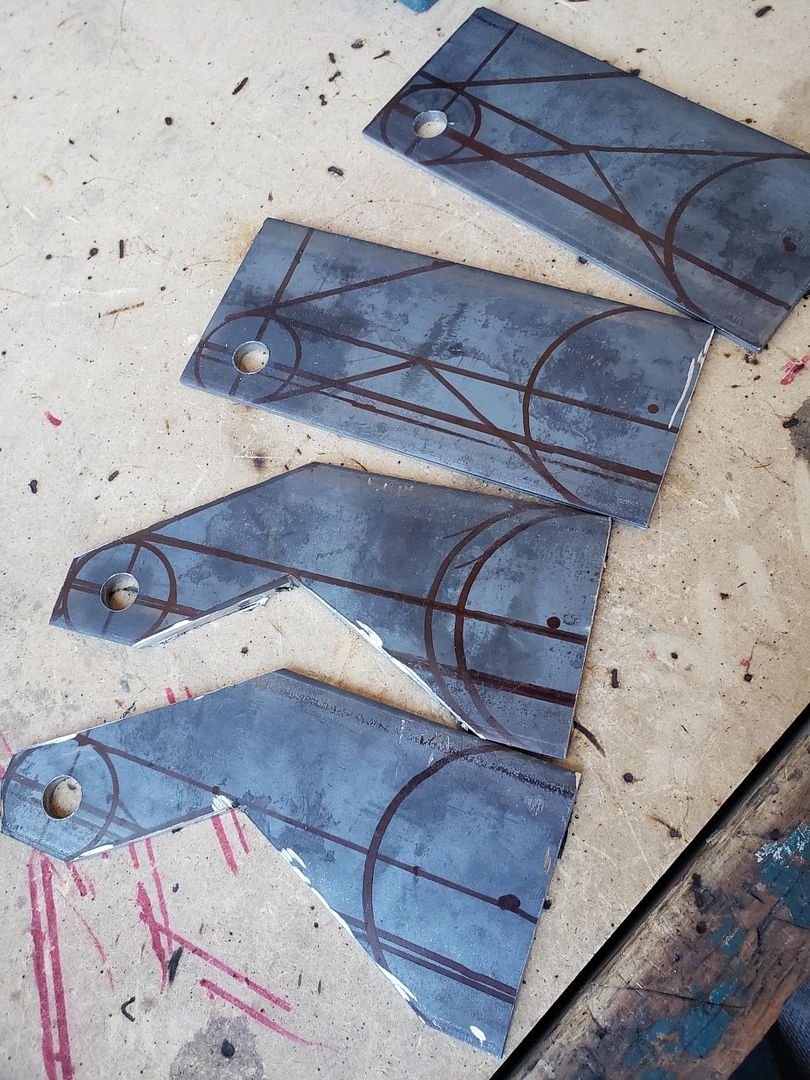
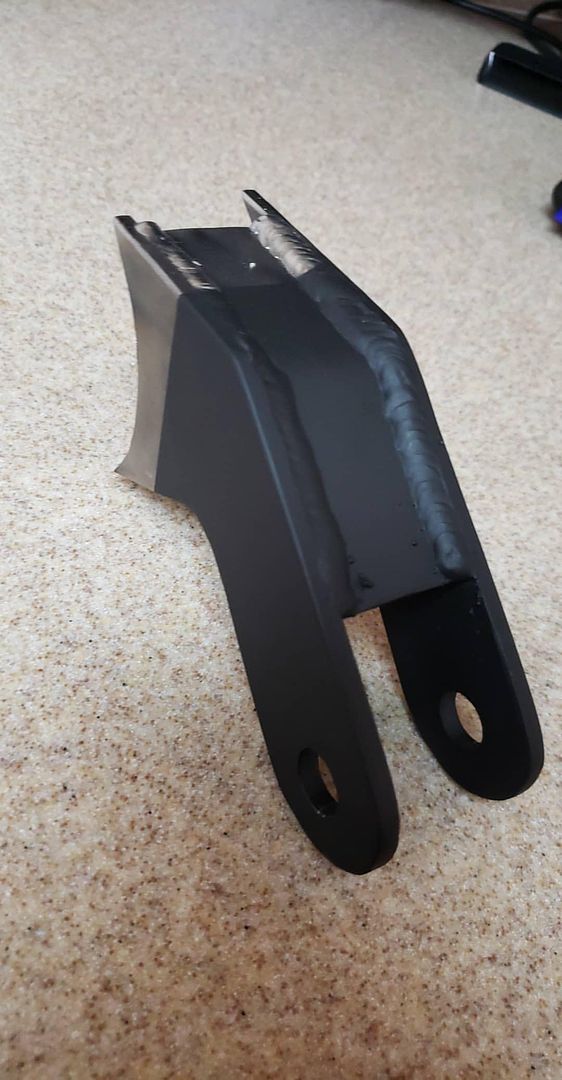
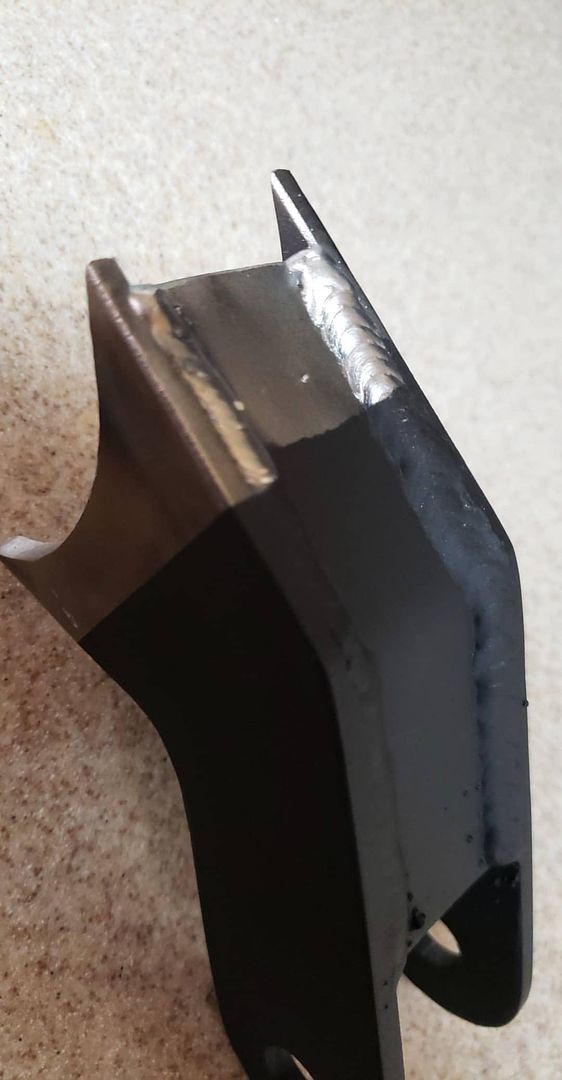
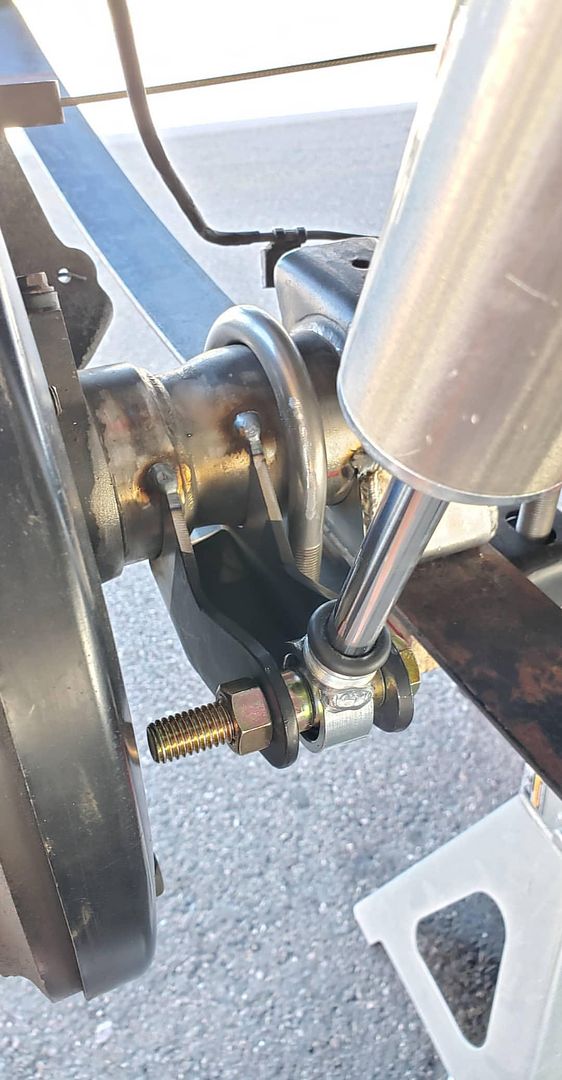
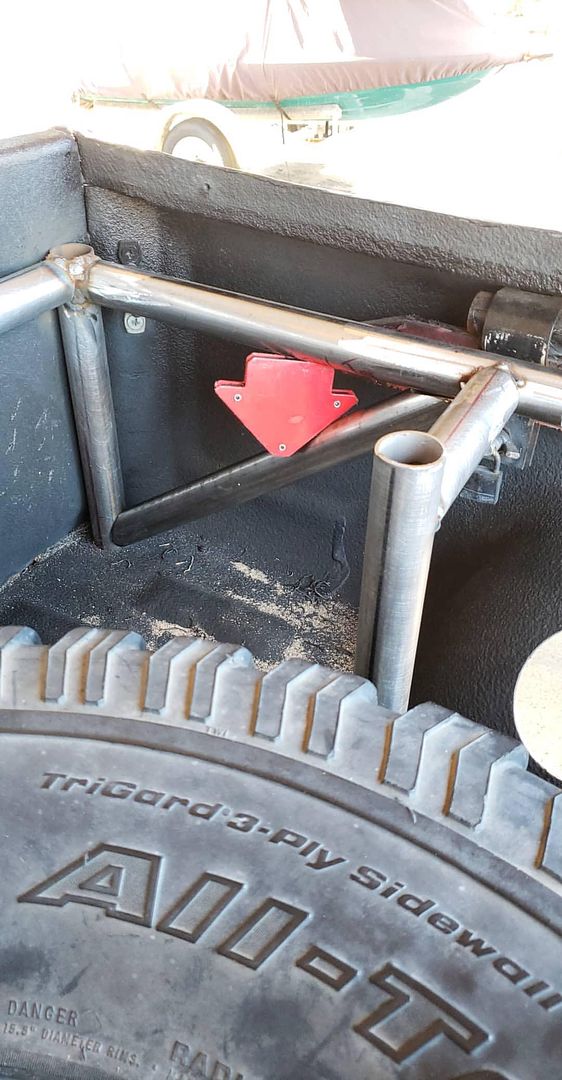
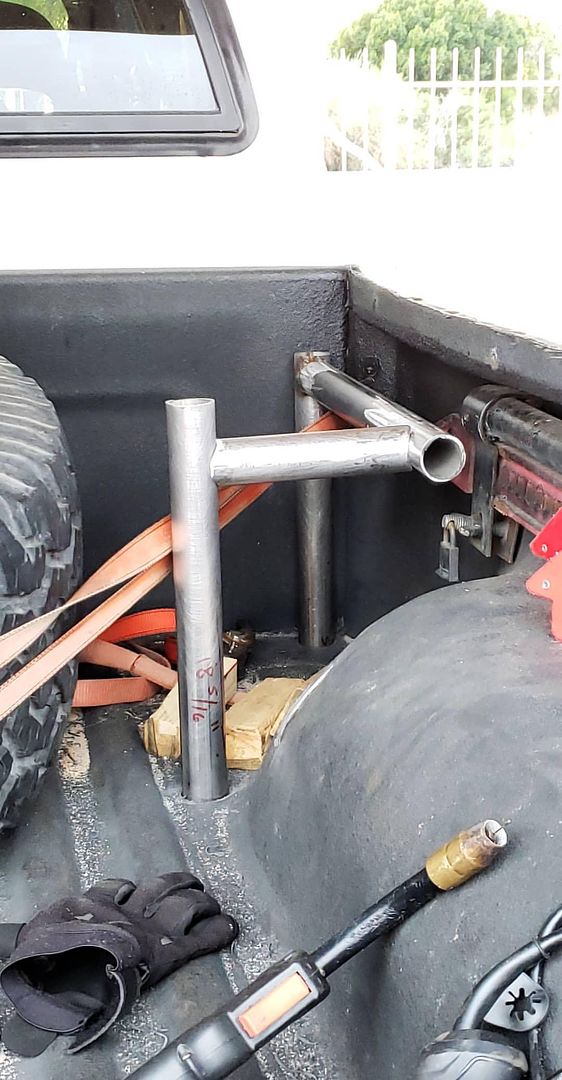
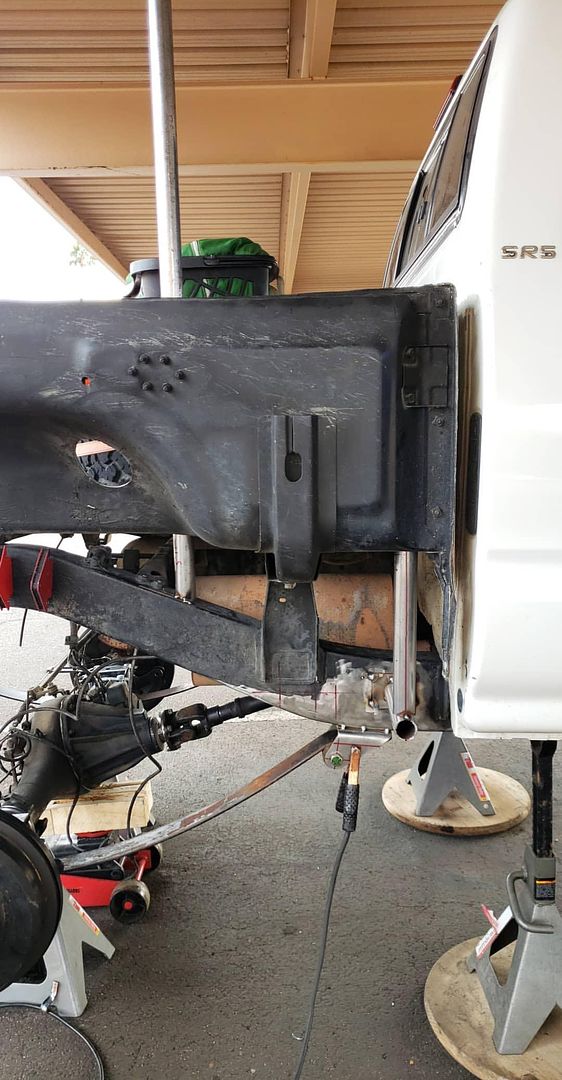
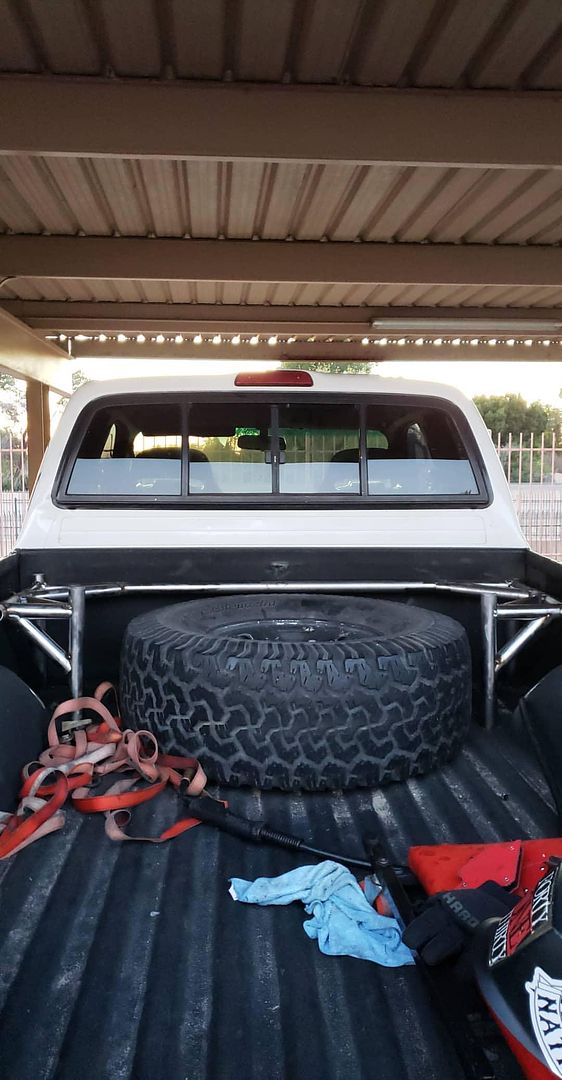
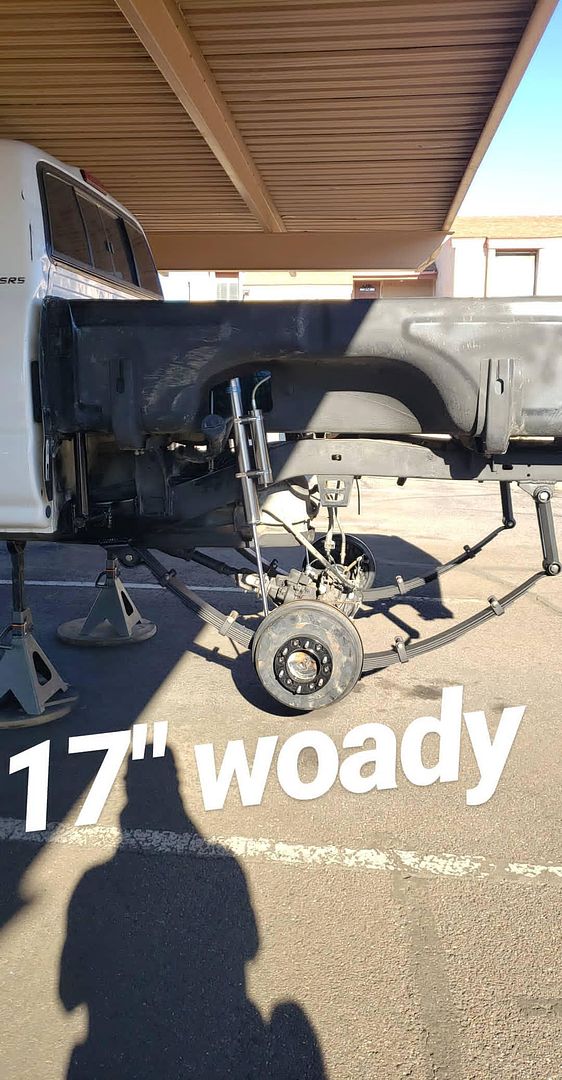
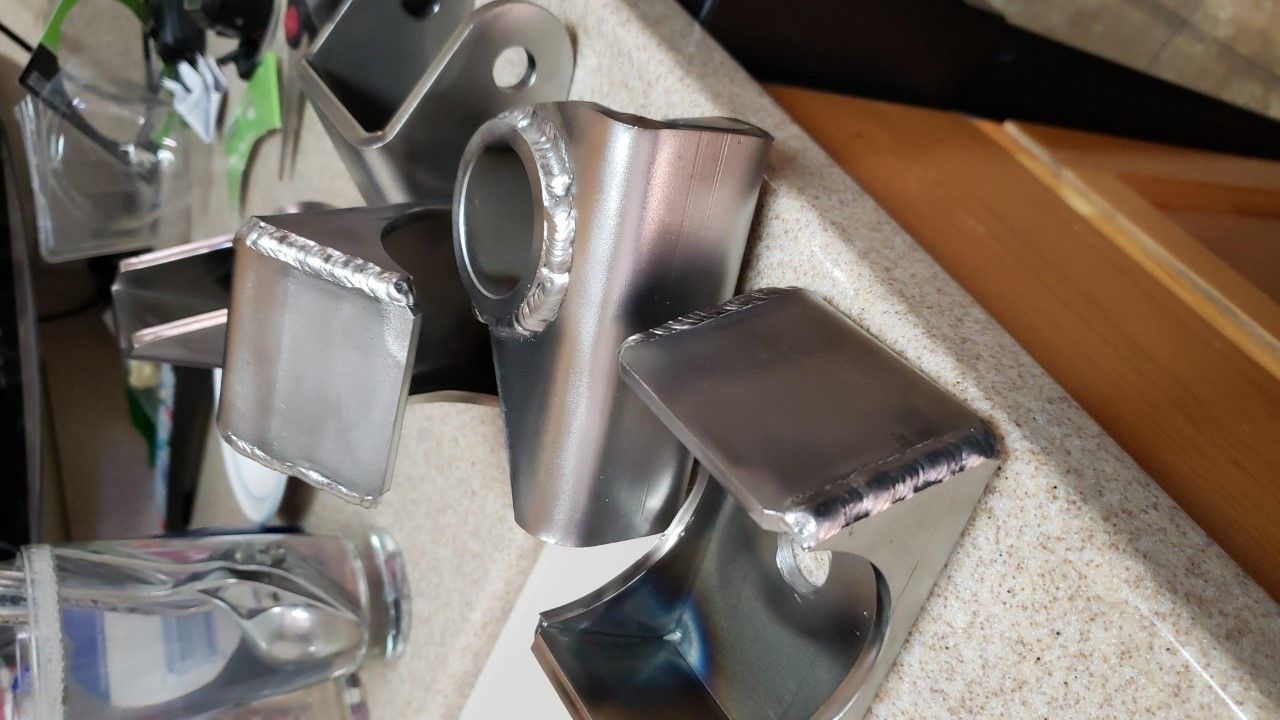
Back - Custom Long Travel by Mexico Joe. Custom bed cage/upper shock mount, custom boxed lower shock mount, Ruff Stuff axle perch, Ruff Stuff Spring Under Plate, Ruff Stuff U Bolts, Ruff Stuff Spring Hanger, Ruff Stuff Shackle Hanger, Deaver F55 Leaf Springs, 14" Bilstein 7100 shocks with 255/70 valving, custom Mexico Joe 9" shackles.
Body: Front - Glassworks 3" Fiberglass fender, front pre-runner tube bumper with 1/4 aluminum skid plate. Back - Fiberwerx Fiberglass Bedside 3''.
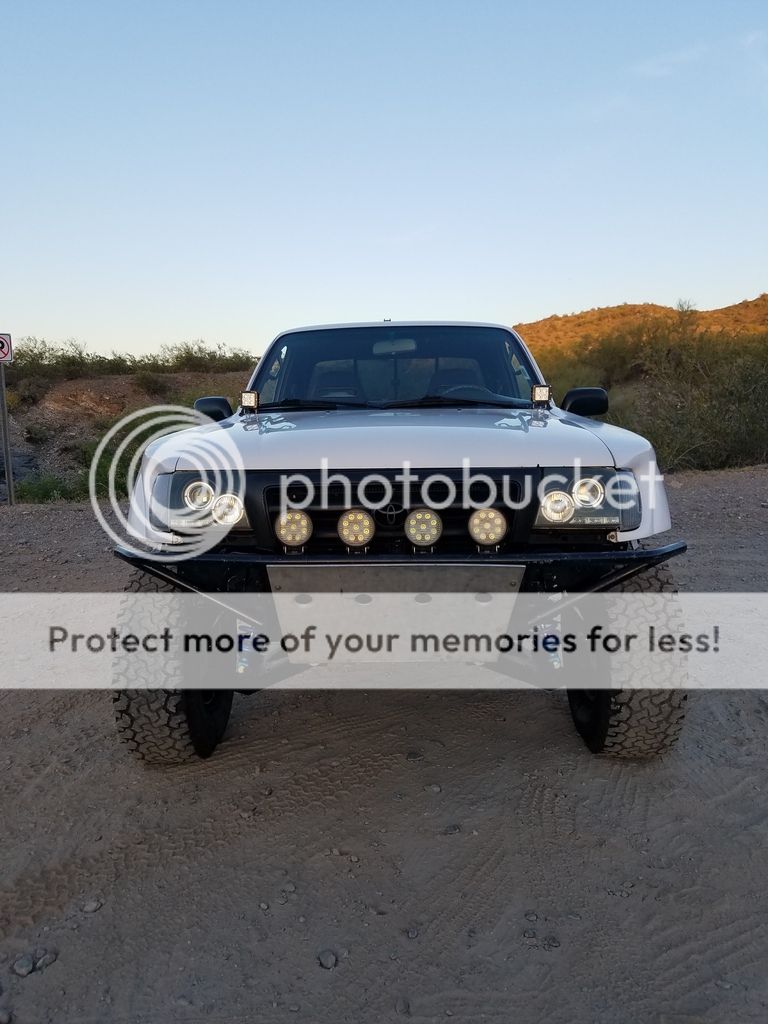
Shoes: 35x17x12.5" Toyo Open Country AT Tires on 17" Mayhem wheels
Lights: 55w HID Headlight, 2 Rigid Industries LED Pod spot lights near hood/A pillar, 4 LED front grill lights (1,200 Lumen per light). Strobe box for grill lights.
I have personally done all of the work myself. This is my poor mans off road ripper/fun run vehicle for RP!
Front: Completely bolt in. No fabrication work required.
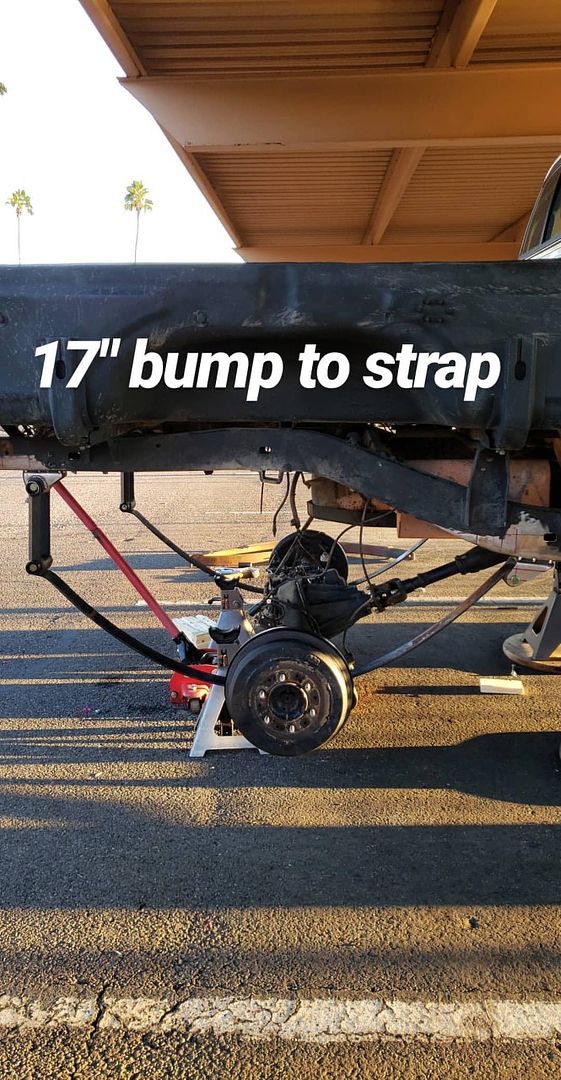
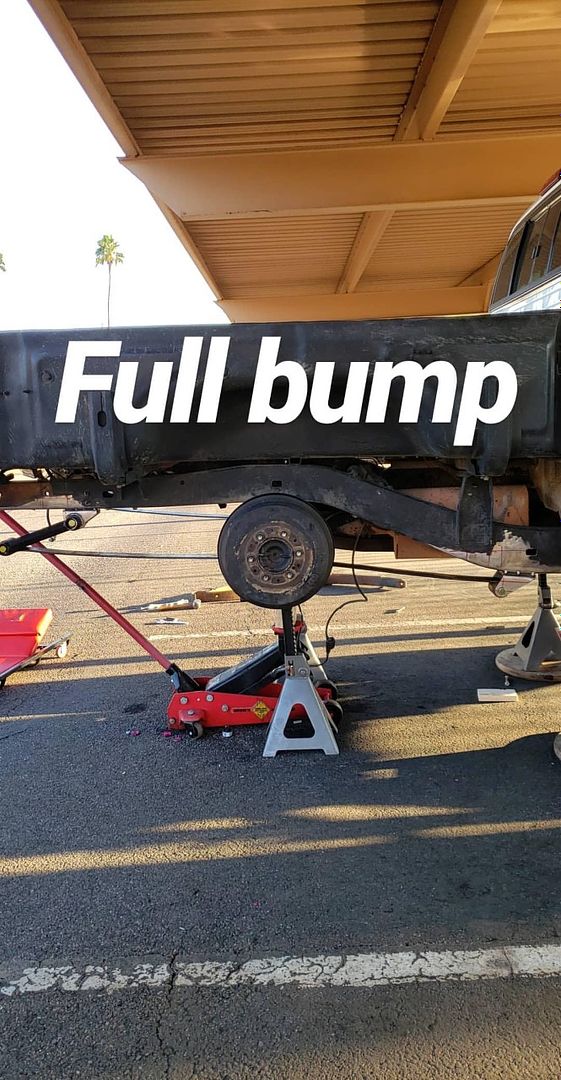
Back:
I also want to start this post for others to post about their vehicles and set ups. Even SXS's are welcome! The one thing this forum has never had is a dedicated page to off roading in and around RP. Post up trip pics, vehicle pics, vehicle specs, suspension set ups, power adders ANYTHING off road related. I suspect there are a fair amount of users that can participate in this forum thread. Rocky Point has always been a fishing/off roaders get a way!
Ok! Let's get this started.
As they used to say on the forums in the early/mid 2000's ------------------ 256k BEWARE!!!!!! --------------------------------------
First Generation Toyota Tacoma 1996-2004
My vehicle: 99 Toyota Tacoma Prerunner SR5 3.4l V6 with a 3 speed tranny w/ electronic OD. Electronic locking rear diff.
Engine: 5vzfe, K&N cold air intake and throttle body spacer. Throttle body has been ported. Doug Thorley Headers, Flow Master 40 exhaust
Suspension: Front - Solo Motorsports 3.5 Long Travel Kit, 8" King Race Series Coilover Shocks with resis, limit straps.
Back - Custom Long Travel by Mexico Joe. Custom bed cage/upper shock mount, custom boxed lower shock mount, Ruff Stuff axle perch, Ruff Stuff Spring Under Plate, Ruff Stuff U Bolts, Ruff Stuff Spring Hanger, Ruff Stuff Shackle Hanger, Deaver F55 Leaf Springs, 14" Bilstein 7100 shocks with 255/70 valving, custom Mexico Joe 9" shackles.
Body: Front - Glassworks 3" Fiberglass fender, front pre-runner tube bumper with 1/4 aluminum skid plate. Back - Fiberwerx Fiberglass Bedside 3''.
Shoes: 35x17x12.5" Toyo Open Country AT Tires on 17" Mayhem wheels
Lights: 55w HID Headlight, 2 Rigid Industries LED Pod spot lights near hood/A pillar, 4 LED front grill lights (1,200 Lumen per light). Strobe box for grill lights.
I have personally done all of the work myself. This is my poor mans off road ripper/fun run vehicle for RP!
Front: Completely bolt in. No fabrication work required.
Back:
.jpg)
.jpg)
.jpg)
.jpg)
.jpg)


.jpg)
.jpg)